The Secret to Sewing Clothes That Fit Perfectly
I love it when all the pattern pieces line up perfectly, all the seams match and it fits perfectly when I am done. It is very satisfying.
It is equally frustrating spending hours sewing a garment—carefully choosing the fabric, cutting every piece with precision, and stitching it all together—only to try it on and realise… it doesn’t fit. It’s too tight across the shoulders, the sleeves are too long, or it’s looser than expected. Sound familiar?
If you’ve ever worried about whether a sewing pattern will fit properly, you’re not alone. When I asked one of the sewing groups, that I belong to, what their biggest concern was when buying patterns, it was overwhelmingly…FIT.
Unlike store-bought clothes, where you can try things on before buying, sewing requires a little more planning to ensure a great result.
But here’s the good news: getting the right fit isn’t as complicated as it might seem. With a few simple steps even before your start sewing, you can be confident that the size is right or close to. Choose the correct size, understanding how a pattern is designed to fit, and even using an AI-powered tool provided by the designer takes some of the guesswork out of sizing.
In this article, I’ll walk you through three essential steps to make sure your next sewing project fits well:
- How to take accurate body measurements (it’s easier than you think!).
- How finished garment measurements work so you know exactly how loose or fitted a pattern will be.
- How to use my website’s AI sizing tool to quickly find the right size for your sewing pattern.
By the end, you will have the knowledge and tools you need to sew garments that fit well—without the stress of wondering if you’ve bought the right size.
1. How to Take Accurate Body Measurements
(It’s Easier Than You Think)
Getting accurate body measurements is the first step to making sure your sewing project fits well. It’s easy to assume you know your (or someone else’s) size, but even a small measuring mistake can lead to a garment that feels too tight, too loose, or just not quite right.
The good news? Measuring properly is simple—you just need a soft measuring tape, a mirror (or a helping hand), and a few key tips to avoid common mistakes.
Key Measurements You Need to Take
When sewing garments for men, these are the most important measurements to get right:
| Chest | Measure around the fullest part of the chest, keeping the tape parallel to the floor. Sit tape under the arms but not too tight. |
|
Waist |
Find the natural waistline (level with the elbow of your bent arm). Don’t pull the tape too tight—have enough room for a finger to slip underneath. |
| Hip | Measure around the widest part of the hips and seat, making sure the tape stays level. |
| Shoulder Width | Measure straight across the back from one shoulder bone to the other. |
| Sleeve Length | Start at the shoulder and measure down to the wrist, with the arm slightly bent. |
| Neck Circumference | Measure around the base of the neck, where a shirt collar would sit. This is especially important for button-up shirts. |
| Back Length | Measure from the base of the neck (where the prominent bone or the vertebra shows when head is forward) down to the natural waist. |
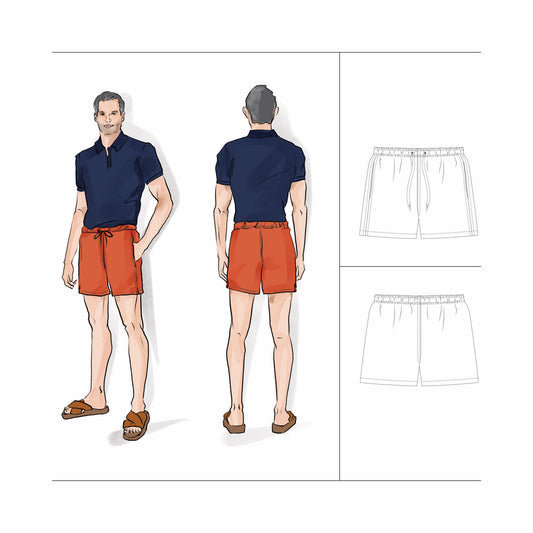
| Inseam | Measure from the crotch to the ankle. (for pants or shorts) |
| High Point Shoulder (HPS) |
Measure from the highest point of the shoulder to the bottom hem of the shirt. |
|
Height (optional but helpful) |
A full-body measurement can provide a reference for adjustments if needed. |
Common Mistakes (and How to Avoid Them!)
🚫 Holding the tape too tight or too loose – The tape should be snug but not squeezing. If it digs in, the measurement will be too small. If it’s loose, the garment may be too big.
🚫 Measuring over thick clothing – Measure over a fitted t-shirt or close-fitting base layer for the most accurate results.
🚫 Slouching or standing unnaturally – Posture matters! Stand straight but relaxed—if you’re measuring someone else, have them look forward instead of down.
🚫 Not keeping the tape level – The measuring tape should stay parallel to the floor for chest, waist, and hip measurements.
🚫 Skipping the double-check – Take each measurement twice to ensure accuracy. If the numbers are different, measure a third time and use the average. I love it when there is a pleasant surprise and you want to measure it again for surprise and delight!
Free Sizing Chart
If you’re new to taking measurements or need a handy reference, download my free Sizing Chart to track your measurements and match them to garment size.
Each sewing pattern company uses its own sizing standards, so recording your favourite brands ensures that next time you shop for a pattern, you’ll know exactly which size to choose:
How to use it:
- Print the chart or open it on your device.
- Follow the visual instructions to measure each area correctly.
- Record the measurements and keep them handy for future projects.
💡 Tip: If you’re sewing for someone else, it helps to take updated measurements every few months—especially if they’re still growing, have weight fluctuations, or wear fitted garments often.
Now that you have accurate measurements, let’s move on to understanding finished garment measurements—this will help you decide exactly how loose or fitted your sewing pattern will be!
Download Your Free Sizing Chart Here
2. Understand How My Finished Garment Measurements Work
Once you’ve taken accurate body measurements, the next step is understanding how they relate to the measurements of a finished garment. Many sewers assume that if their chest measures 40 inches, they should pick a pattern with a 40-inch chest measurement. But that’s not quite how it works.
Body Measurements vs. Finished Garment Measurements
The key difference? Finished garment measurements include ease, which is extra space built into the design to allow for movement and comfort.
Here’s why body measurements and finished garment measurements don’t match exactly:
• Body Measurements: The actual size of your body with no extra room.
• Finished Garment Measurements: The dimensions of the sewn garment, which include additional space for fit and movement (ease).
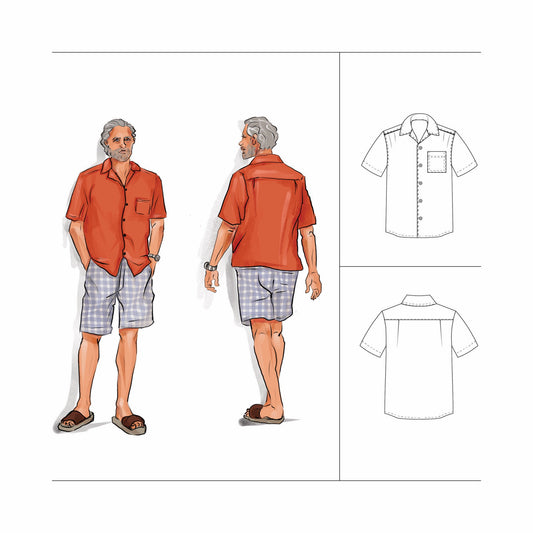
For example, if you choose a camp collar shirt pattern with a chest measurement of 40 inches (the same as your chest size), the shirt would be skin-tight with no room to move. Instead, the pattern includes extra inches to ensure a comfortable, stylish fit.
How Ease Affects Fit and Style
Ease is what determines how fitted or relaxed a garment will feel when worn. There are three main types of ease to consider:
- Wearing Ease – The extra space needed for basic movement and comfort (e.g., lifting your arms, sitting). Even a close-fitting shirt needs at least 2 inches of ease.
- Design Ease – Additional ease added for style and silhouette (e.g., oversized shirts, boxy jackets). This varies based on fashion trends and pattern design.
- Negative Ease – Used in stretch garments where the fabric needs to hug the body (e.g., knit t-shirts or swimwear). The garment is smaller than body measurements, but the fabric stretches to fit.
Here’s a general guide for how much ease is typically included in different types of garments We have use 40” chest which = to our Men’s Medium Body size:
| Garment Type |
Ease Amount
(Chest Measurement Example) |
Fit Description |
| Slim/Fitted Shirt | 2-3 inches (Body: 40” → Finished: 42-43”) | Close to the body but comfortable. |
| Regular-Fit Shirt | 3-5 inches (Body: 40” → Finished: 43-45”) | A standard, everyday comfortable fit. |
|
Relaxed Shirt (e.g. Camp Collar) |
5-7 inches (Body: 40” → Finished: 45-47”) A looser, easy-going fit. | A looser, easy-going fit. |
| Oversized Shirt | 40” → Finished: 48” or more) | Boxy, oversized look with lots of movement. |
Jane Harbison Design sewing patterns are drafted with a regular to relaxed fit. Refer to the Finished Garment and Body measurements in each of the pattern instructions.
💡 Tip: If you prefer a slightly looser or tighter fit than the pattern suggests, compare the finished garment measurements to a shirt you already own and love. This gives you a real-world reference point for how the garment will fit.
Example: A Fitted Shirt vs. a Camp Collar Shirt
To put this into perspective, let’s compare two common styles:
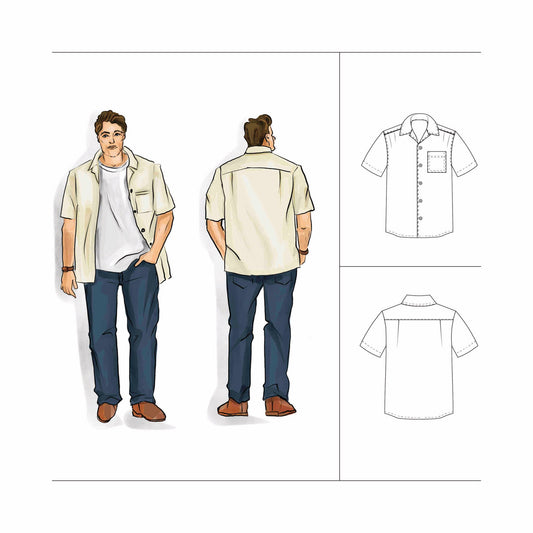
✅ Fitted Button-Up Shirt (Oxford): A more tailored look with 2-3 inches of ease in the chest. It sits close to the body and is best for formal or structured styles.
✅ Camp Collar Shirt: A relaxed, casual shirt with 5-7 inches of ease, allowing for movement and a breezier feel. This is great for summer wear or layering.
If you love a loose, easy-going fit, choosing a pattern with extra ease built in will give you that look—without needing to size up incorrectly.
How to Use Finished Garment Measurements to Choose the Right Size
- Check the Finished Measurements on the Pattern – These are usually included on the pattern envelope (physical pattern) and instructions (physical and PDF). Compare them to your body measurements.
- Decide on Your Preferred Fit – Use the table above to determine if you like a fitted, regular, or relaxed look.
- Use the AI Sizing Tool for Guidance – The AI-Copilot tool on this website helps answer your sizing questions when it comes to buying a Jane Harbison Design pattern. The responses only reference Jane Harbison Design standard body size, which can differ to other sewing pattern companies. An manual alternative is to Click the “Size Chart” link available on any pattern product to view our standard Body sizes.
Now that you understand how finished garment measurements work, let’s take the guesswork out of choosing a size by using the AI Copilot Tool on the website.
3. Use the Website AI Co-pilot to Find the Right Size Sewing Pattern For Your Body
I have aimed to take the guess work out of choosing the right size sewing pattern with an AI Copilot Tool built into the website. Simply put in your body measurements and it will give you an instant recommendation on what size to buy. Prompt it again as shown and it will tell you how much fabric you’ll need!
All our bodies are different shapes.
Get personalised results in just a few clicks.
💡 Watch the videos below for a demonstration on how to use the tool, including real examples of how it works in action.
4. Final Tips for a Good Fit
By now, you’ve learned how to take accurate measurements and understand finished garment measurements—but what else can you do to ensure your sewing project fits? Here are a few extra steps that will give you even more confidence before you cut into your final fabric.
1. Make a Quick Test Garment (Toile or Muslin)
One of the best ways to check fit before committing to your final fabric is to sew a test garment, particularly if you have never sewn it before. This is often called a toile or a muslin (in the US named after the inexpensive cotton fabric commonly used for this purpose) I use calico for my toiles.
A toile lets you see how the pattern fits your body before making any permanent changes.
You can test the ease, length, and proportions without worrying about ruining expensive fabric.
If adjustments are needed, you can mark changes directly on the toile and transfer them to your pattern.
💡 Tip: If you don’t want to make a full toile, consider sewing just the upper body portion of a shirt to check chest fit and shoulder width.
2. Adjusting Patterns for Personal Fit Preferences
Every body is unique, and while sewing patterns provide a great base, they’re not one-size-fits-all. If you know you typically need to tweak certain areas (e.g., lengthening sleeves or adjusting the shoulder width), it’s worth making those changes before you cut your fabric.
Some common pre-sewing pattern adjustments include:
- Lengthening or shortening (torso, sleeves, pant legs).
- Blending between sizes (for example, choosing a larger chest size and a smaller waist size).
- Adding or reducing ease for a tighter or looser fit.
If you’re unsure how to adjust a pattern, researching pattern alteration techniques specific to your needs on Youtube and Instagram is a great resource. A couple I recommend are @ryliss_sewinganddesignschool @thriftystitcher and @sewover50 no doubt have a wealth of connections for this too.
Here are some common ones:
Pattern Adjustments (Before Sewing)
- Full Chest Adjustment (FCA) – Expands or reduces the chest area of a pattern for a better fit without changing the overall garment shape.
- Narrow or Broad Shoulder Adjustment – Adjusts the shoulder width to prevent a too-tight or too-loose fit across the upper body.
- Lengthening/Shortening a Pattern – Increases or decreases the length of a garment (e.g., torso, sleeves, pant legs) to better suit body proportions.
-
Blending Between Sizes – Combines different pattern sizes (e.g., a larger chest with a smaller waist) for a custom fit. Multi-sized patterns can make this easier.
Sway Back Adjustment – Removes excess fabric at the lower back to eliminate pooling or bunching in fitted garments.
Fitting Tweaks (During Sewing)
- Taking in or letting out side seams – Adjusts the width of a garment for a closer or looser fit.
- Shortening a hem – Raises the hemline of a shirt, pants, or jacket for the desired length.
- Adding darts for shaping – Creates shaping at the bust, waist, or back to improve contouring.
- Adjusting sleeve width – Narrows or widens sleeves to improve fit and comfort.
Even if you don’t need these now, keeping them in mind will make future sewing projects easier!
3. Fabric Choice Can Affect Fit
Your fabric choice plays a major role in how a garment fits and drapes on the body. Some fabrics naturally cling more, while others create a looser silhouette.
- Woven Fabrics (Cotton, Linen, Denim, Poplin, etc.) – Hold their shape well but don’t stretch, so they require the correct ease for movement.
- Stretch Fabrics (Jersey, Knit, Spandex, etc.) – Stretch with the body, so they often use negative ease (smaller than body measurements).
- Drape Fabrics (Rayon, Silk, Viscose, etc.) – Hang softly and may make a garment feel looser, even if the measurements are correct.
- Thick or Structured Fabrics (Canvas, Wool, Coating, etc.) – May reduce flexibility, so extra ease might be needed.
💡 Tip: If a pattern is designed for woven fabric but you want to use a stretch fabric, you may need to size down or adjust for the extra give.
In summary your quick checklist for a Good Fit
✔️ Take accurate body measurements before choosing a pattern size.
✔️ Compare finished garment measurements to a well-fitting garment you have in the cupboard.
✔️ Consider ease and how it affects the final fit.
✔️ Make a Toile (or at least test key areas) before sewing with final fabric, especially if you haven't made it before.
✔️ Choose a fabric that matches the intended fit of your garment.
✔️ Apply basic pattern adjustments to customise fit if needed.
Written by Jane Harbison, sewing pattern and fabric designer specialising in boys' and men's clothing, colour tools and wearable handmade gifts.